Geneva - Renew an SSL Certificate
#bash #openssl #nginx #systemctl
Scenario: "Geneva": Renew an SSL Certificate
Level: Easy
Type: Fix
Description: There's an Nginx web server running on this machine, configured to serve a simple "Hello, World!" page over HTTPS. However, the SSL certificate is expired.
Create a new SSL certificate for the Nginx web server with the same Issuer and Subject (same domain and company information).
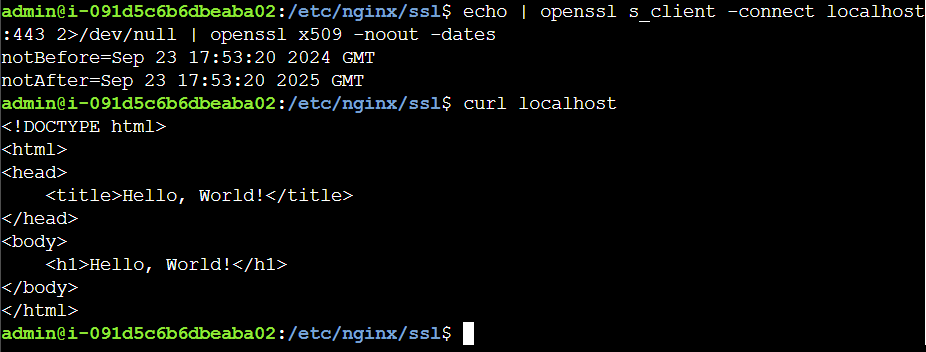
Test: Certificate should not be expired: echo | openssl s_client -connect localhost:443 2>/dev/null | openssl x509 -noout -dates and the subject of the certificate should be the same as the original one: echo | openssl s_client -connect localhost:443 2>/dev/null | openssl x509 -noout -subject
The "Check My Solution" button runs the script /home/admin/agent/check.sh, which you can see and execute
Notes and solution
First, let's see where the current certificate is located and if there is a private key with it.
cat /etc/nginx/sites-available/default
![[CertLocationNginx.PNG]]
where we can see that both the certification and the private key are stored in /etc/nginx/ssl/
Then, it's necessary to create a new SLL certificate using openssl. To skip the step where we would have to enter all the necessary information (Company name, State, Country, email, etc.) we'll use the existing certificate to extract that information.
.key files are usually the private key, used by the server to encrypt and package data for verification by clients.
.pem files are generally the public key, used by the client to verify and decrypt data sent by servers. PEM files could also be encoded private keys, content must be verified before assuming any or the other.
.p12 files have both halves of the key embedded, so that administrators can easily manage halves of keys.
.cert or .crt files are the signed certificates.
.csr is a certificate signing request, a challenge used by a trusted third party to verify the ownership of a keypair without having direct access to the private key.
- In the self-signed scenario you will use the certificate signing request with your own private key to verify your private key (thus self-signed). Depending on your specific application, this might not be needed. (needed for web servers or RPC servers, but not much else).
Here is an example of what the CSR information prompt will look like:
---
Country Name (2 letter code) [AU]:US
State or Province Name (full name) [Some-State]:New York
Locality Name (eg, city) []:Brooklyn
Organization Name (eg, company) [Internet Widgits Pty Ltd]:Example Brooklyn Company
Organizational Unit Name (eg, section) []:Technology Division
Common Name (e.g. server FQDN or YOUR name) []:examplebrooklyn.com
Email Address []:
Change to the directory where the certificate and private key are located:
cd /etc/nginx/ssl
To get this information out of the expired SSL certificate, we can use OpenSSL.
openssl x509 -noout -text -in nginx.crt
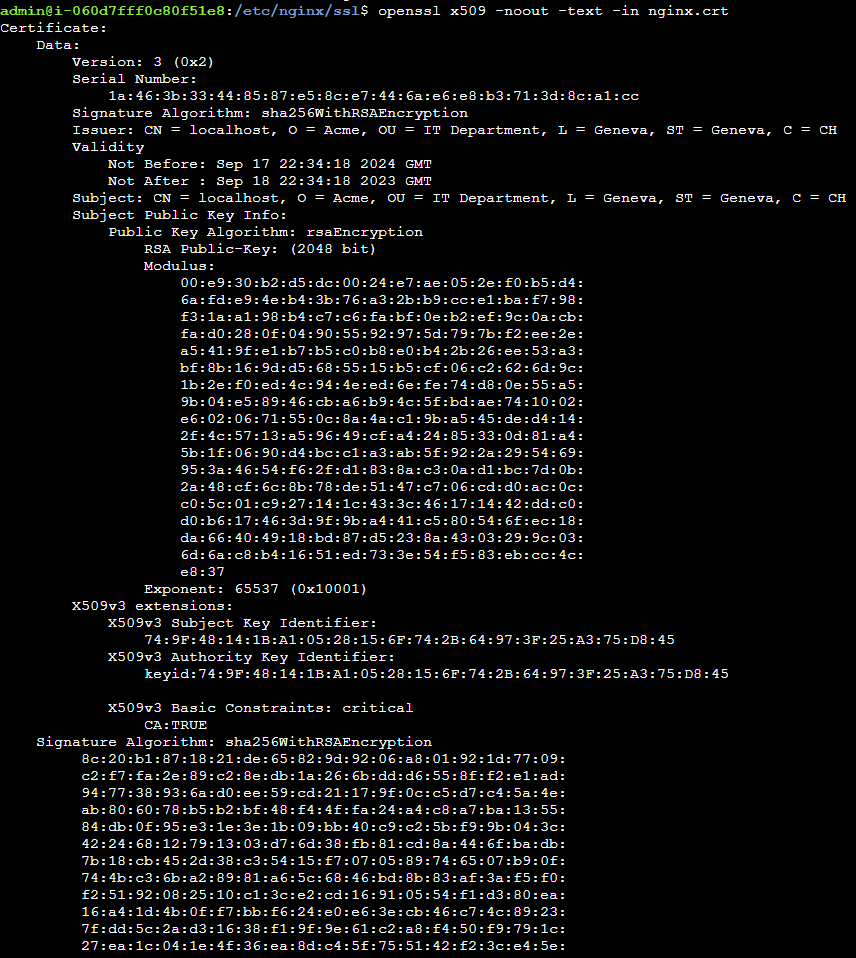
Here, we can see that the original certificate has the following information:
Issuer: CN = localhost, O = Acme, OU = IT Department, L = Geneva, ST = Geneva, C = CH
Subject: CN = localhost, O = Acme, OU = IT Department, L = Geneva, ST = Geneva, C = CH
Validity
            Not Before: Sep 17 22:34:18 2024 GMT
            Not After : Sep 18 22:34:18 2023 GMT
To enter this information non-interactively when creating the signing request (.csr), use the -subj option for OpenSSL.
-subj "/C=CH/ST=Geneva/L=Geneva/O=Acme/CN=localhost"
Before making a new certificate and private key, rename the original files to make sure that they do not conflict with the new certificate and key.
sudo mv nginx.crt nginx.crt.old
sudo mv nginx.key nginx.key.old
This command creates a self-signed certificate (nginx.crt) and a private key (nginx.key) using the information from the original certificate (-subj).
sudo openssl req -x509 -nodes -days 365
	-newkey rsa:2048 -keyout nginx.key
	-out nginx.crt
	-subj "/CN=localhost/O=Acme/OU=IT Department/L=Geneva/ST=Geneva/C=CH"
Now, it's necessary to restart Nginx:
sudo systemctl restart nginx
And then the certificate is renewed!!